In this image a new virtual network switch called “New Virtual Switch Private” is being set up. This is part of setting up virtual machines to communicate internally within a secure, isolated environment.
Lab Description
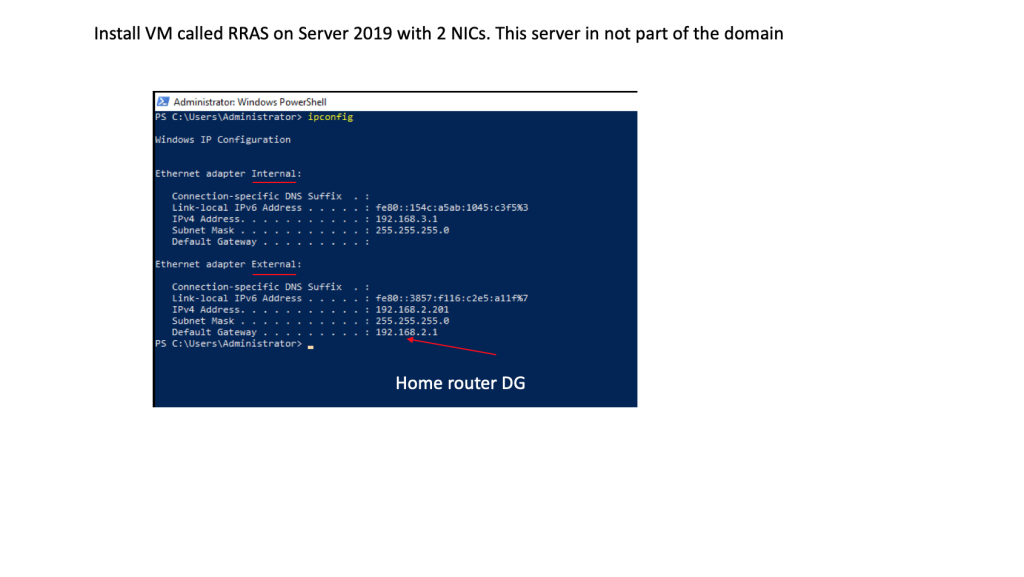
Next, A virtual machine (VM) named RRAS is being installed on Windows Server 2019. This server is not connected to the corporate domain, meaning it operates independently
Lab Description
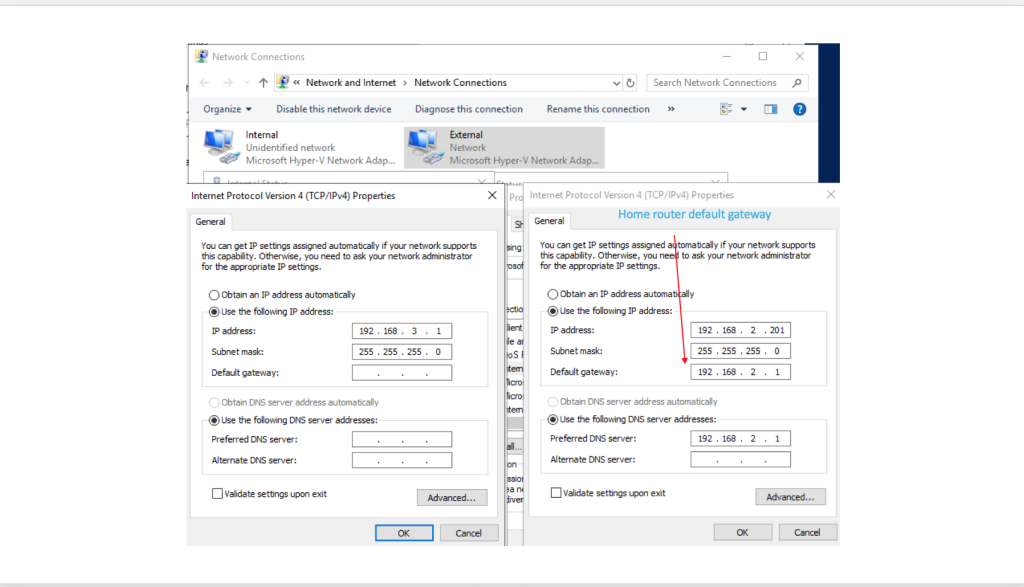
This image shows the network settings for two different types of connections on a Windows computer. These settings determine how the computer connects to other devices, including the internet.
Lab Description
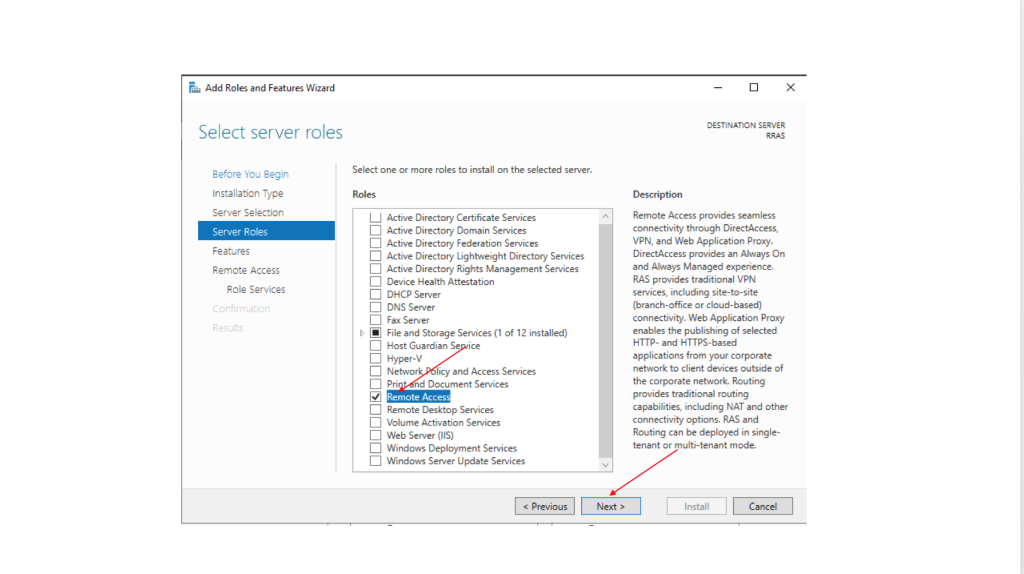
This image shows a step in the Windows Server “Add Roles and Features Wizard”, specifically the “Select Server Roles” section.
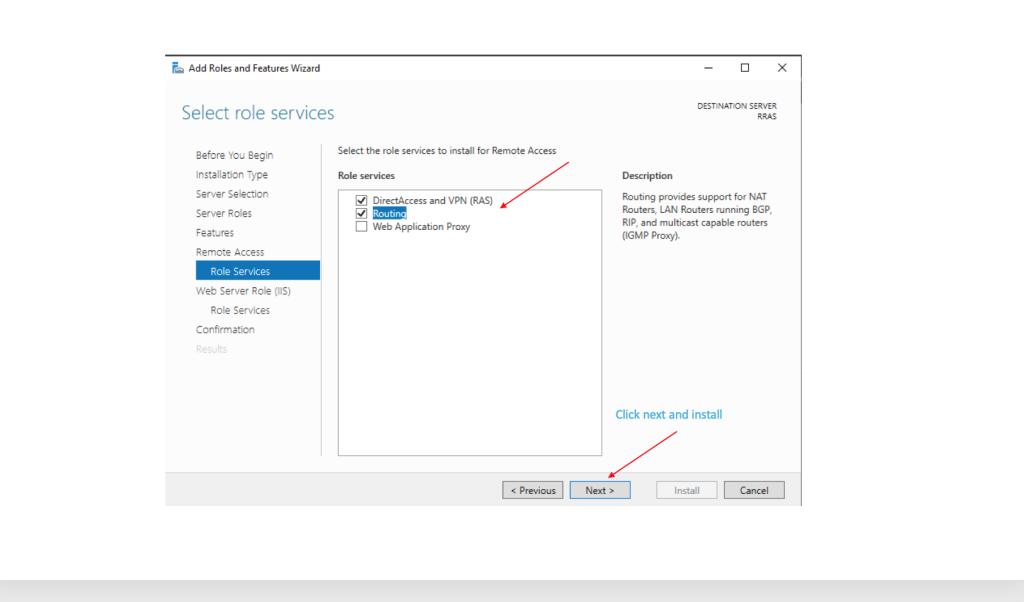
This image shows a step in the Windows Server setup where it is enabling Remote Access features, specifically VPN (RAS) for secure remote connections and Routing to manage network traffic.
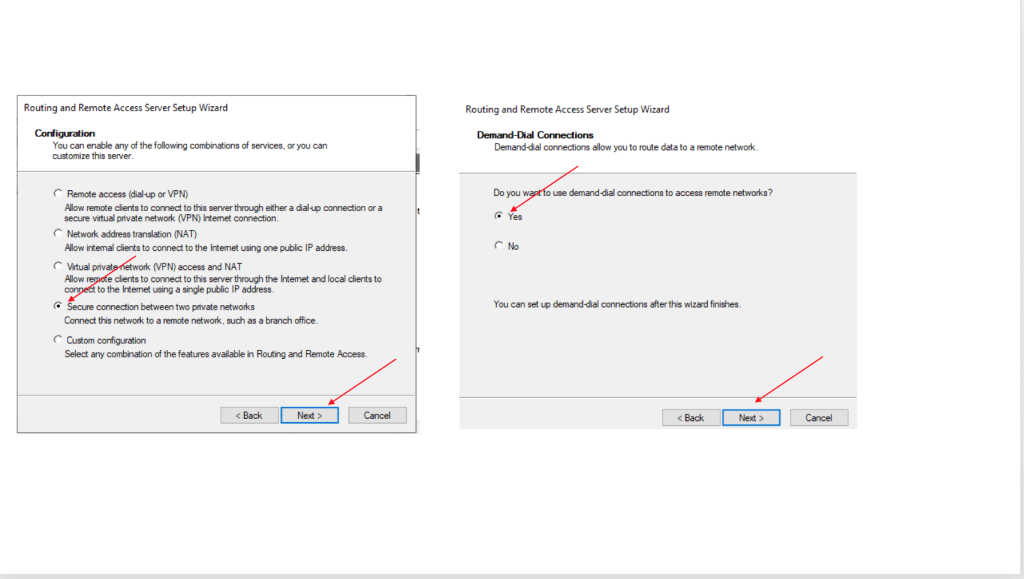
This image shows two steps in the Routing and Remote Access Server Setup Wizard on a Windows Server.
This image shows two steps in the Routing and Remote Access Server Setup Wizard for configuring network services on a Windows Server.
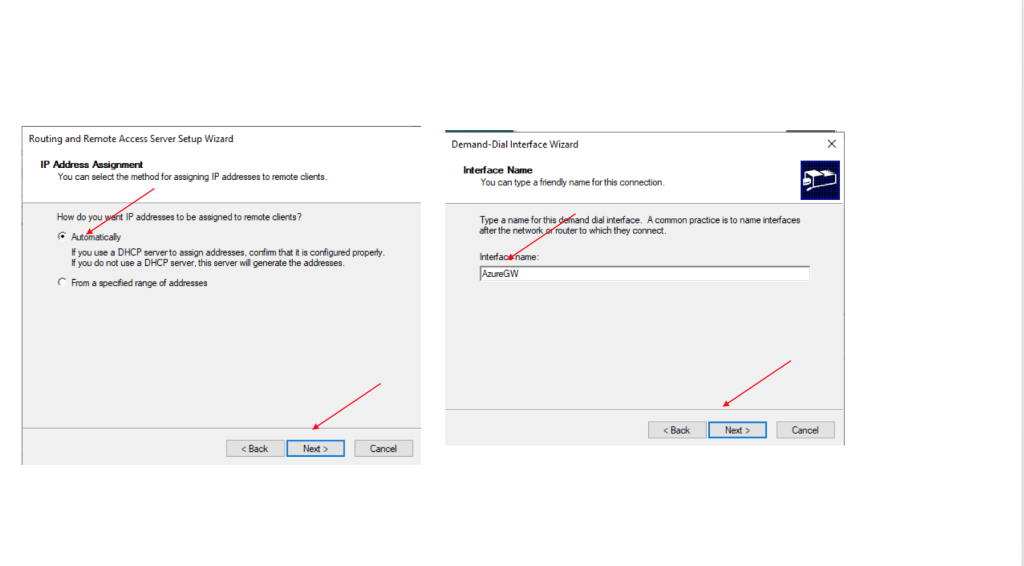
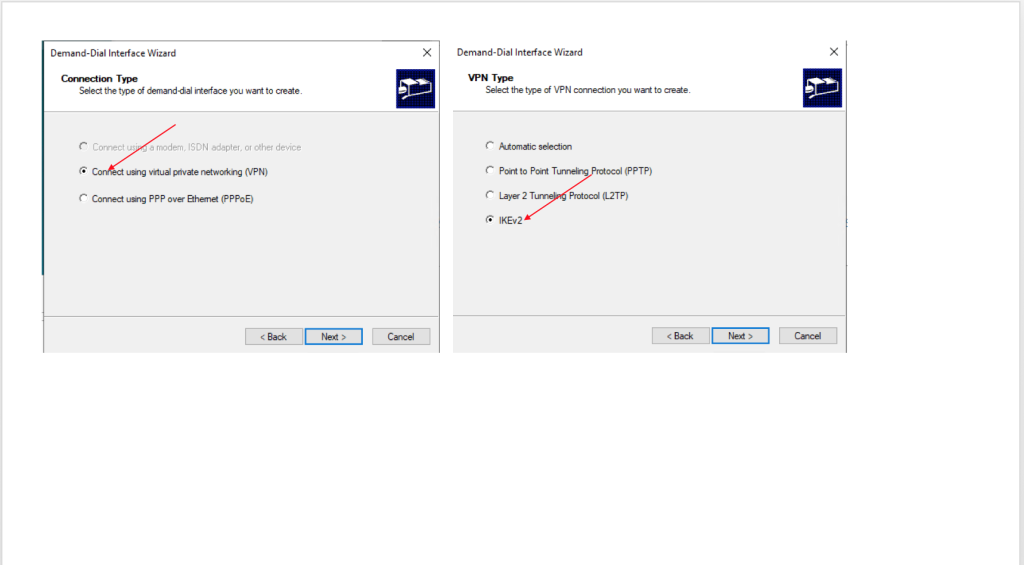
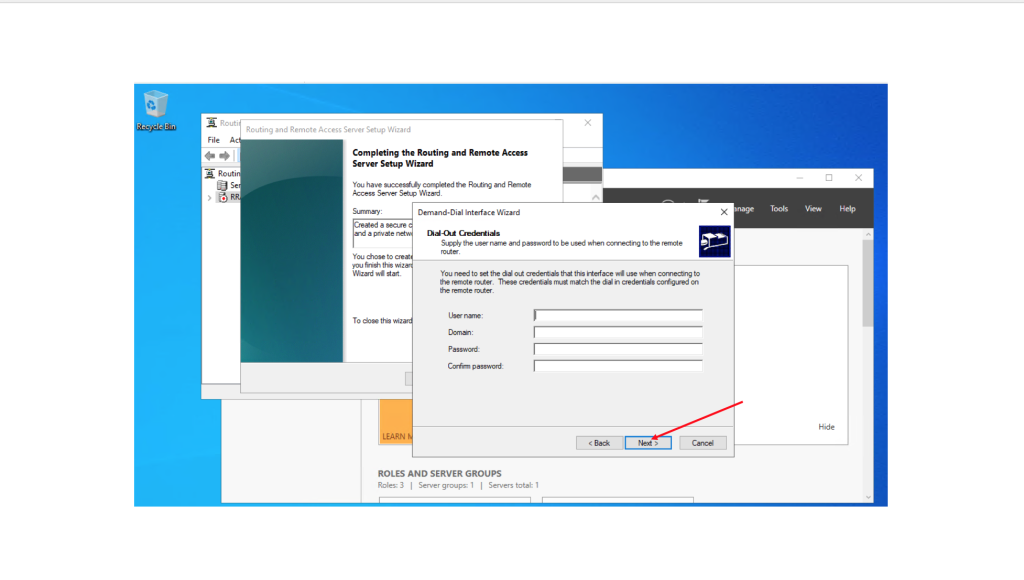
This image shows two steps from the Demand-Dial Interface Wizard in Windows Server, which is used to configure a VPN connection to a remote network.
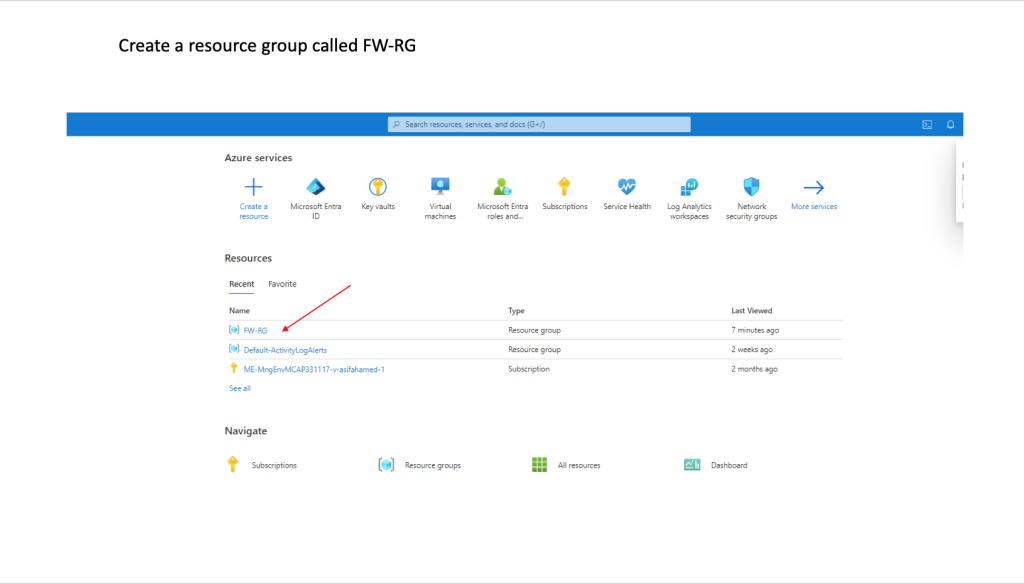
This image is from the Microsoft Azure portal, and it demonstrates the successful creation of a resource group named FW-RG.
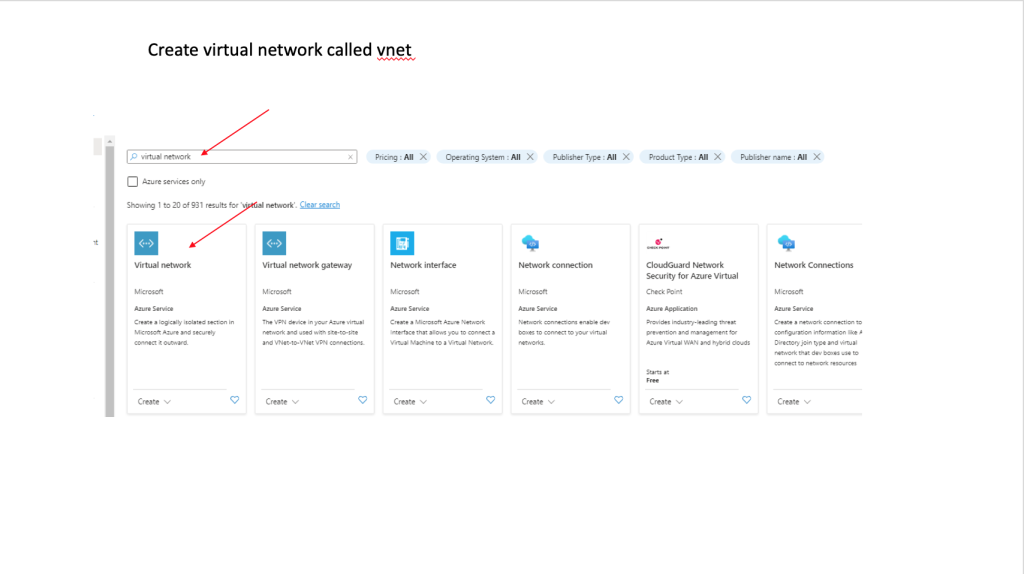
This image shows a Microsoft Azure portal, showing the process of starting to create a Virtual Network (VNet) named vnet
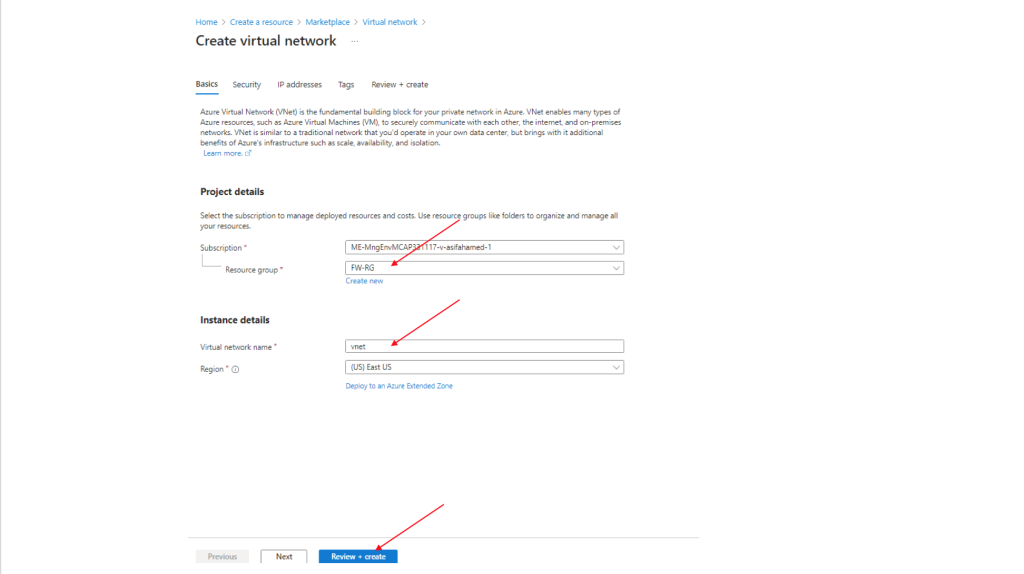
This image shows the “Create virtual network” form in the Microsoft Azure portal, where a user is setting up a new Virtual Network (VNet) named vnet
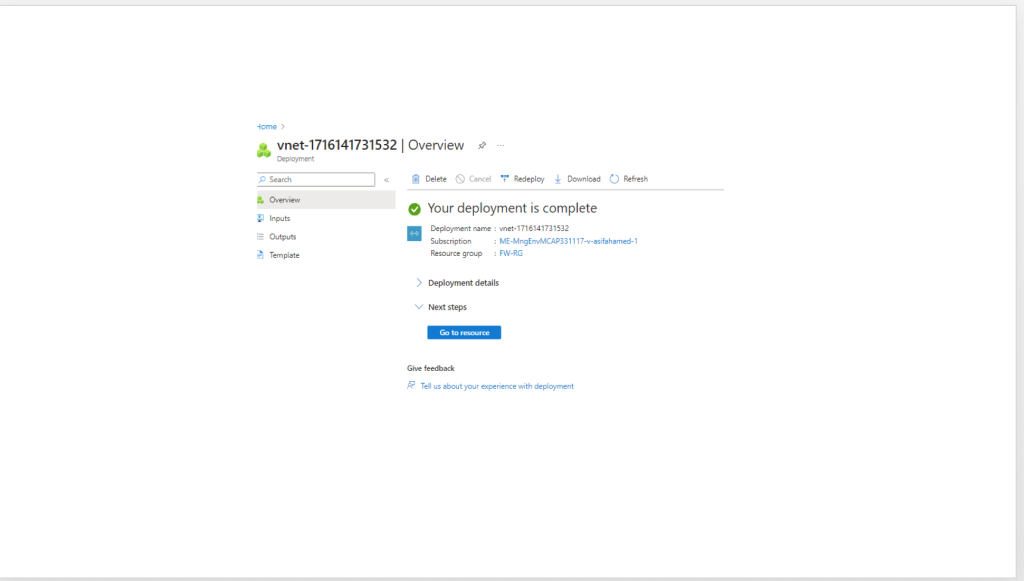
This image shows the deployment confirmation screen in the Microsoft Azure portal, indicating that a virtual network (VNet) has been successfully created.
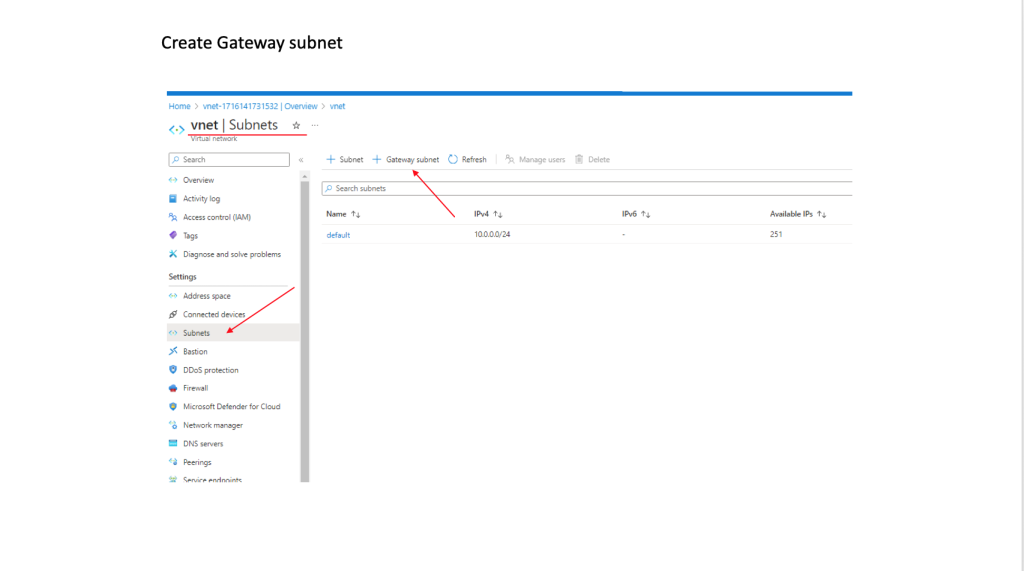
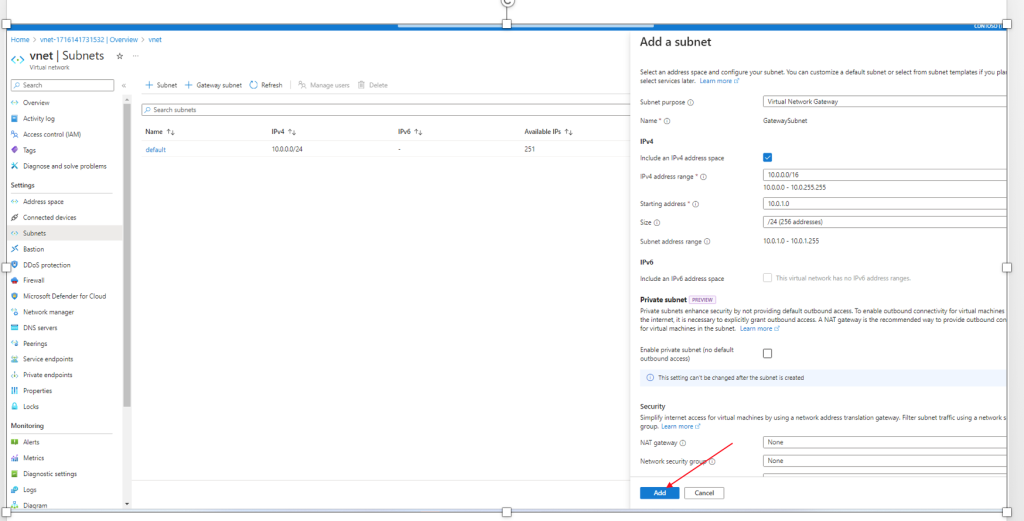
This image shows the process of creating a Gateway Subnet in Microsoft Azure as part of configuring a Virtual Network (VNet)
This image shows the Gateway Subnet creation process in the Microsoft Azure portal, specifically within a Virtual Network (VNet)
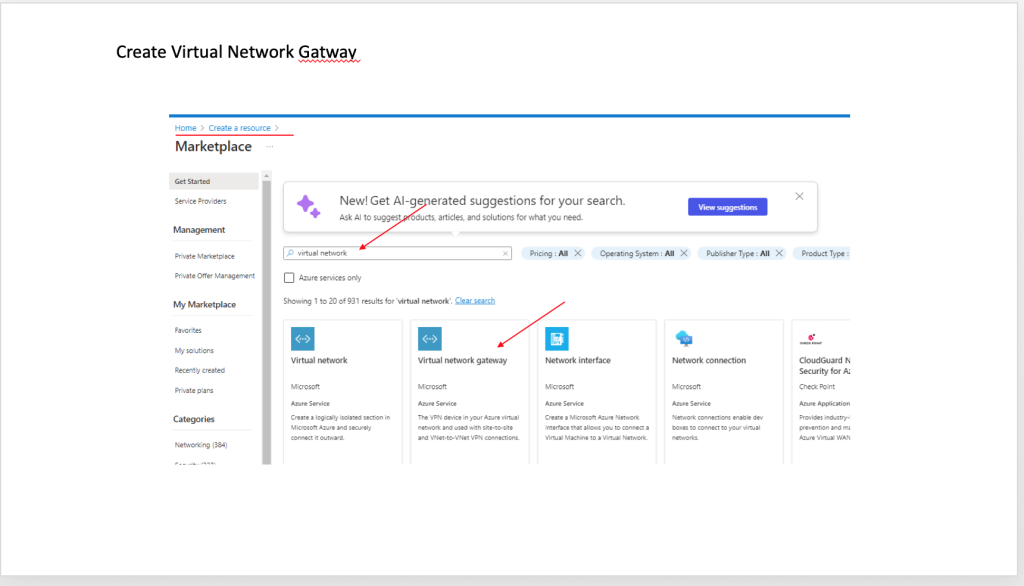
This image shows the process of creating a Virtual Network Gateway in Microsoft Azure.
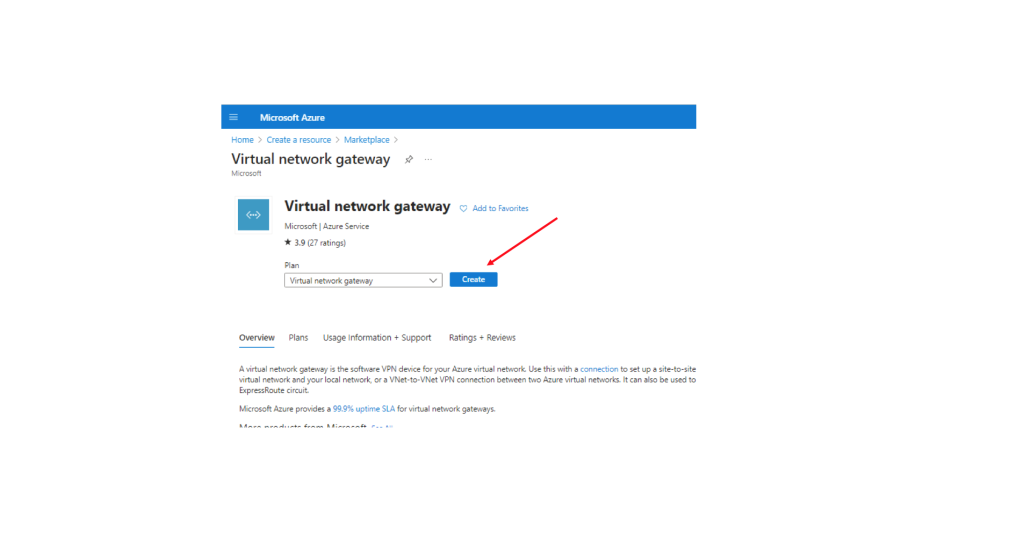
This image shows the final step before creating a Virtual Network Gateway in the Microsoft Azure portal.
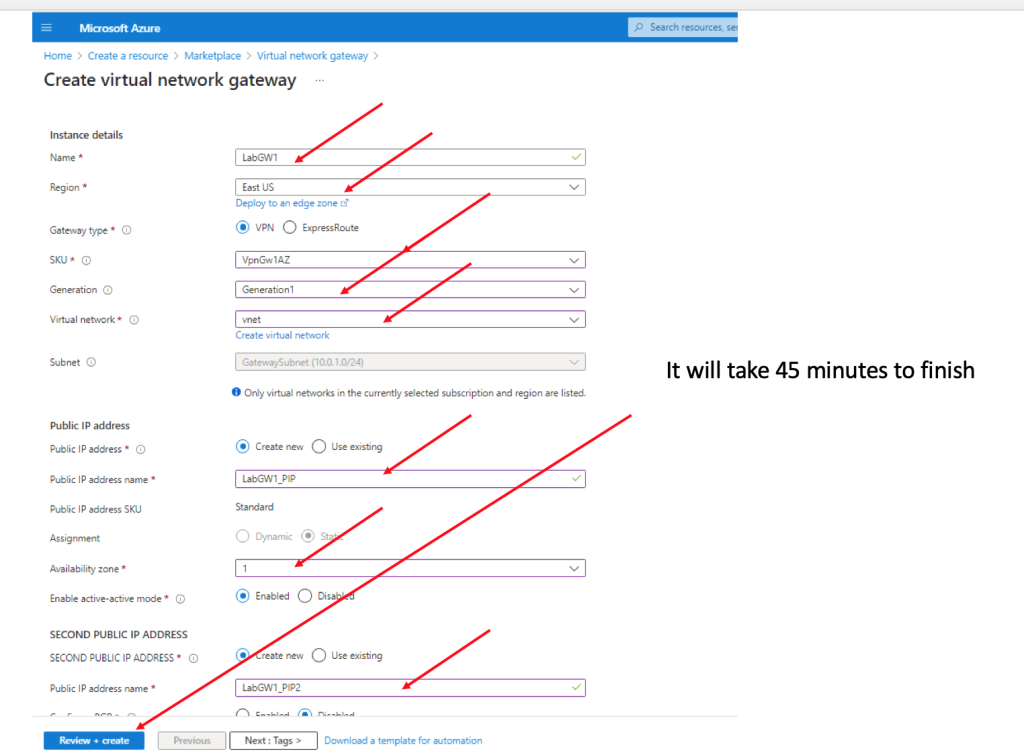
This image shows the configuration screen for creating a Virtual Network Gateway in Microsoft Azure.
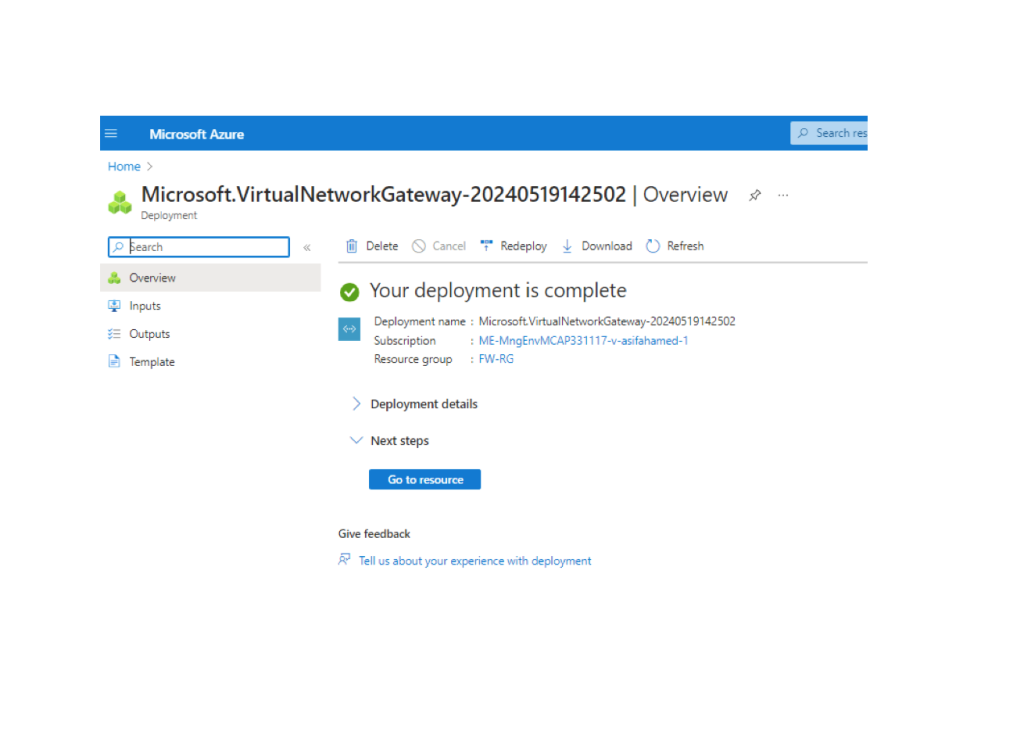
This image shows the confirmation screen in the Microsoft Azure portal indicating that a Virtual Network Gateway deployment has been successfully completed.
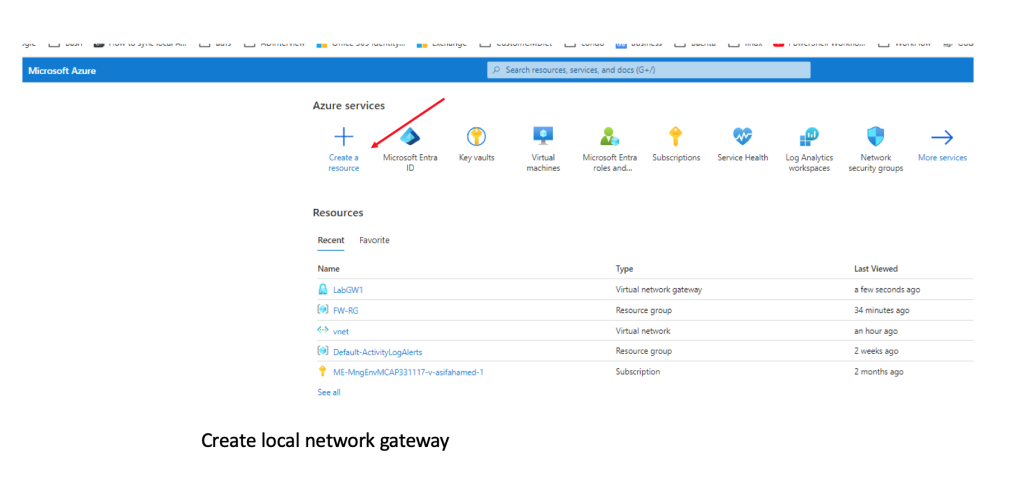
This image shows the Microsoft Azure portal dashboard where the user is about to begin the process of creating a Local Network Gateway
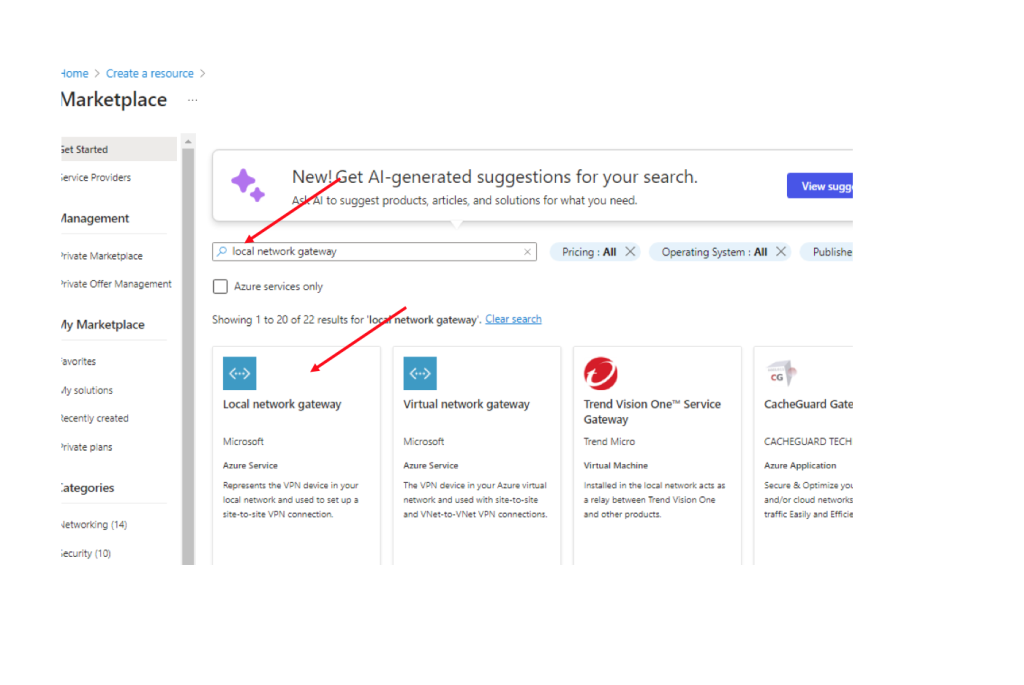
This image shows the step in the Microsoft Azure portal where the user searches for and selects the Local Network Gateway resource from the Marketplace
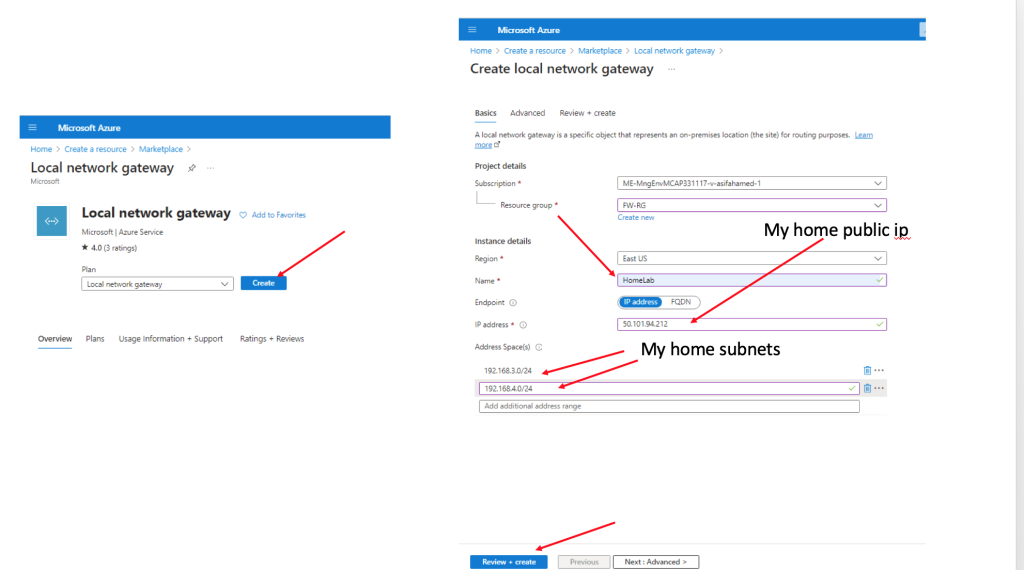
This image shows the process of creating a Local Network Gateway in the Microsoft Azure portal, specifically for connecting your home network to Azure over a VPN connection.
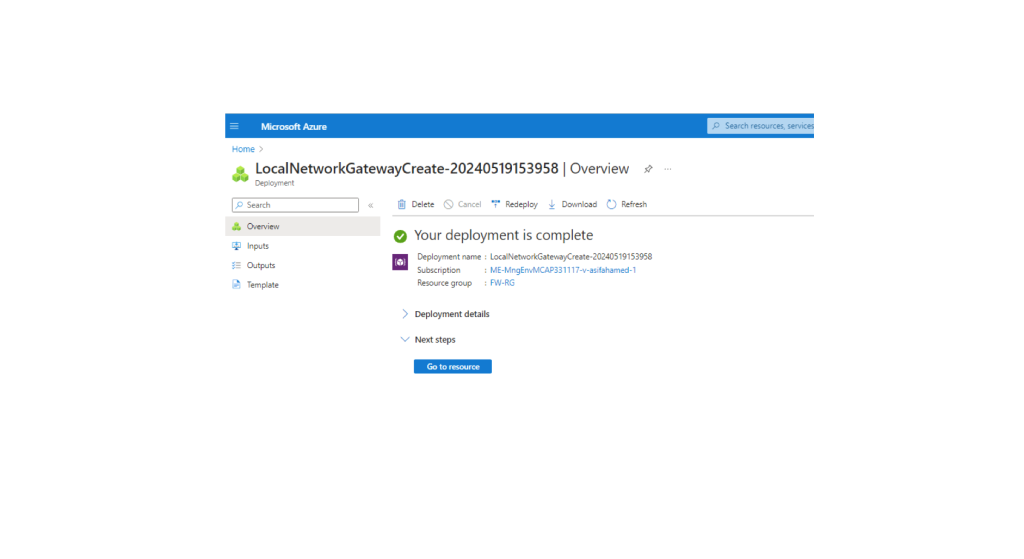
This image shows the deployment success screen in the Microsoft Azure portal, confirming that a Local Network Gateway has been created successfully.
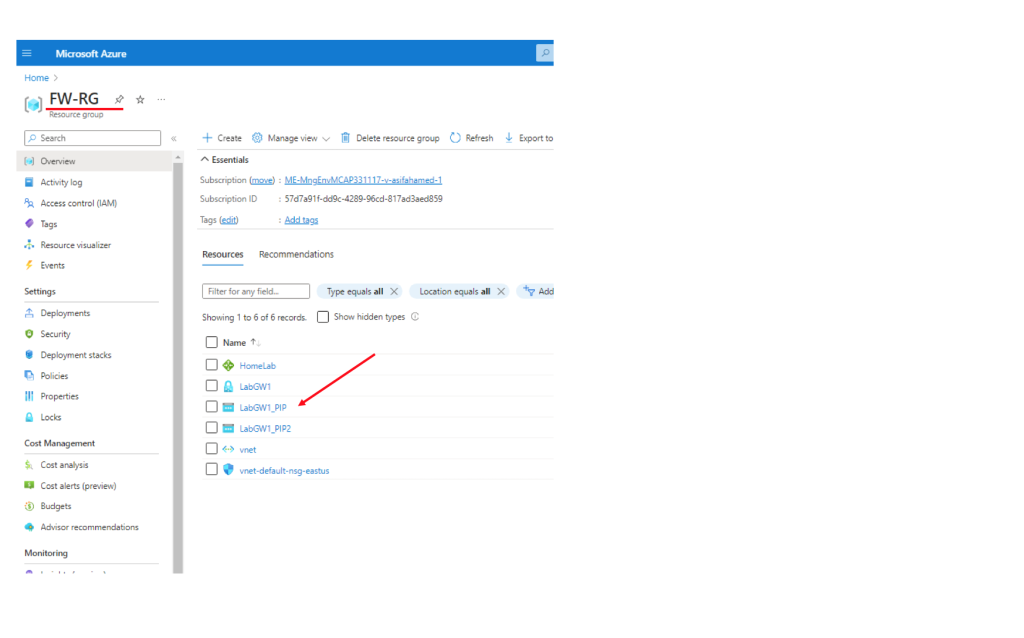
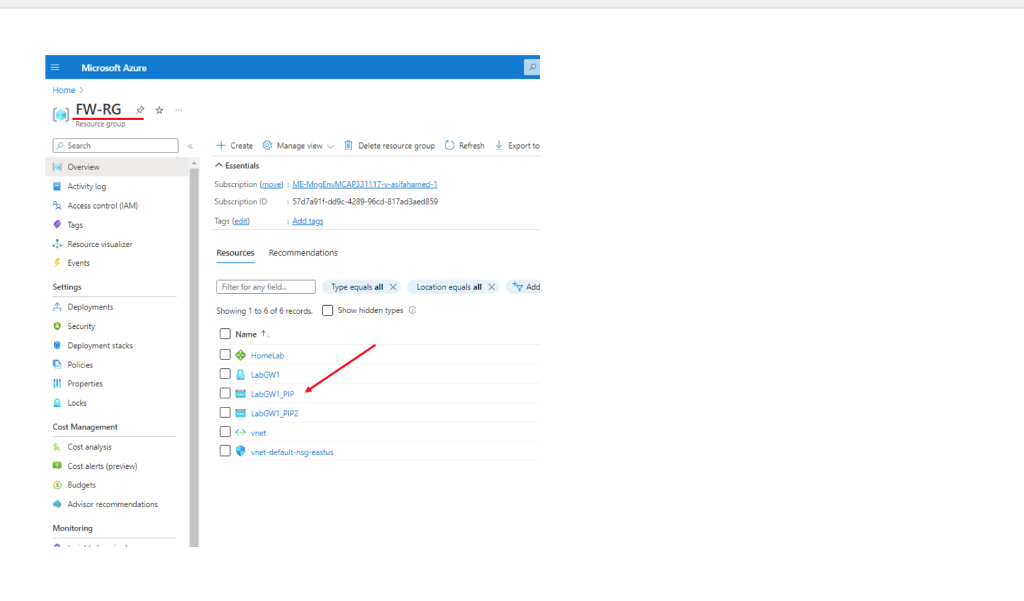
This image shows the contents of a resource group named FW-RG in the Microsoft Azure portal. It displays all the resources that have been created as part of setting up a site-to-site VPN between an on-premises (home) network and Azure.
This image displays the Azure portal view of a resource group named FW-RG, showing a list of deployed resources associated with a site-to-site VPN setup
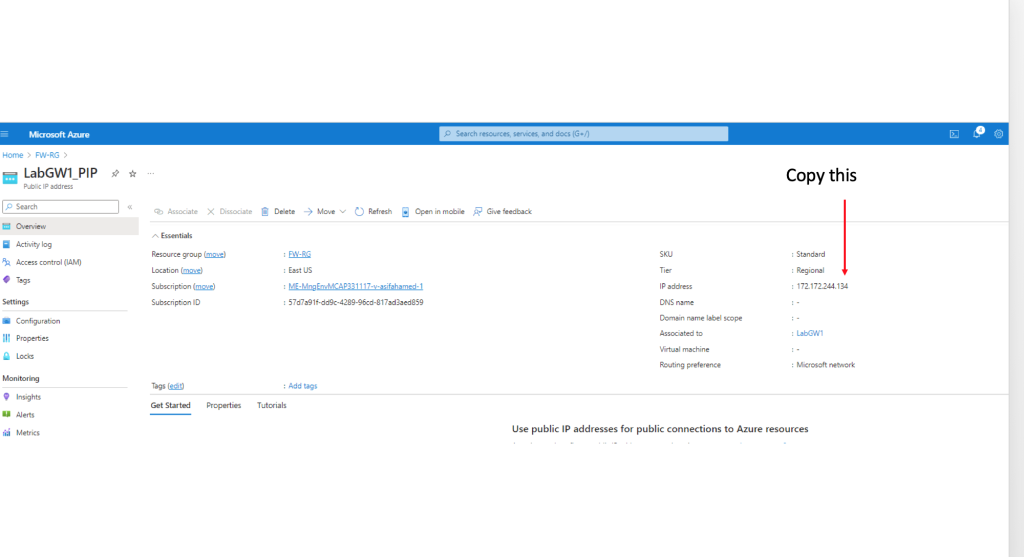
This image shows the public IP address details for the Azure VPN Gateway in the Azure portal. The red arrow and “Copy this” label highlight the IP address you need to configure your on-premises VPN device for a Site-to-Site VPN connection.
This image shows the Routing and Remote Access Service (RRAS) configuration screen on a Windows Server virtual machine named BASE01. It specifically focuses on the step where you’re configuring a Demand-Dial VPN Interfac
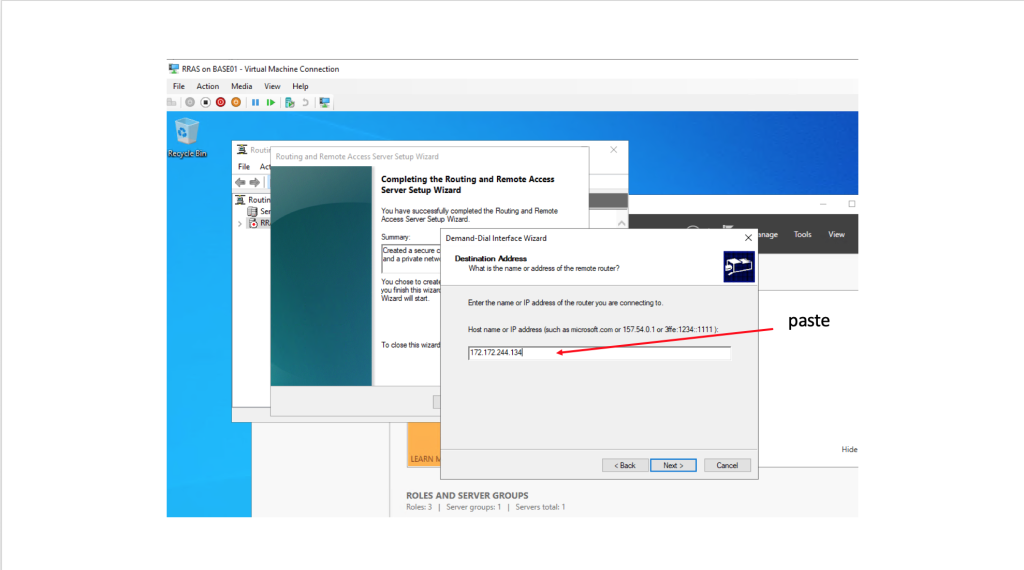
This image shows a step in the Demand-Dial Interface Wizard as part of configuring Routing and Remote Access (RRAS) on a Windows Server (BASE01). The wizard is helping set up a VPN connection to another site—likely to Azure in this case
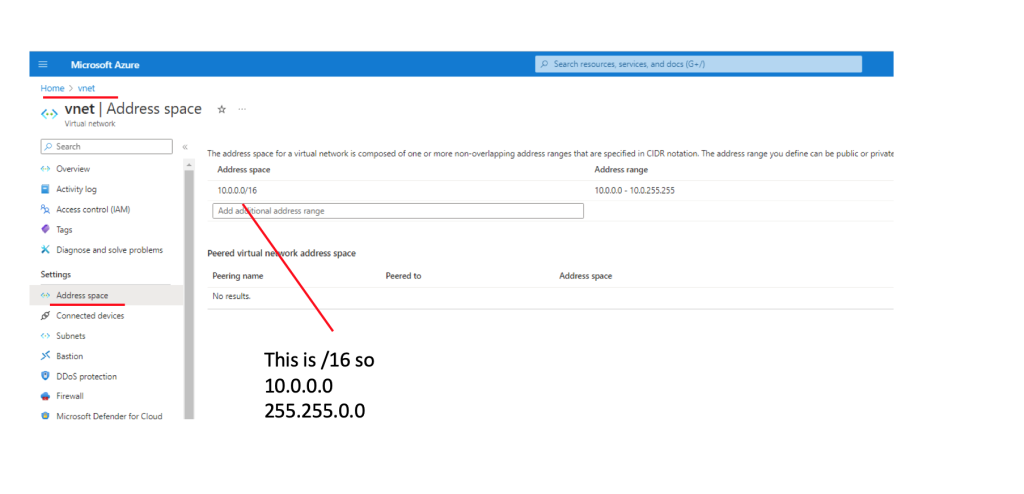
This image shows the Address space configuration for a virtual network (VNet) named vnet in Microsoft Azure.
This image shows the address setup for a virtual network (VNet) in Microsoft Azure.
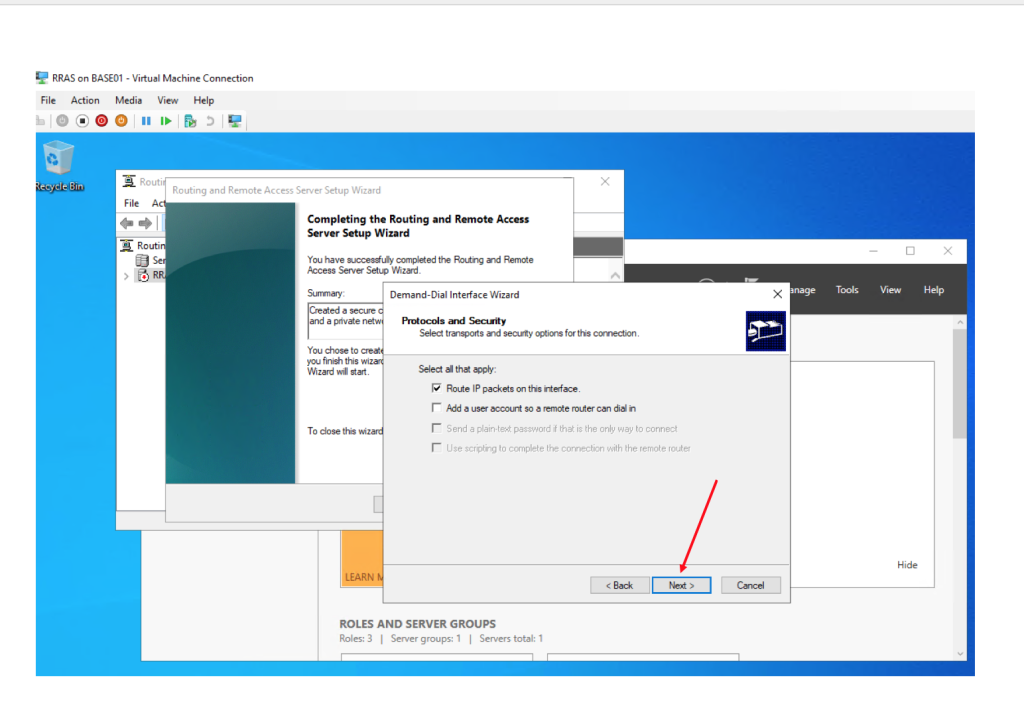
This image shows a step in the Demand-Dial Interface Wizard during the setup of Routing and Remote Access Server (RRAS) on a Windows Server machine.
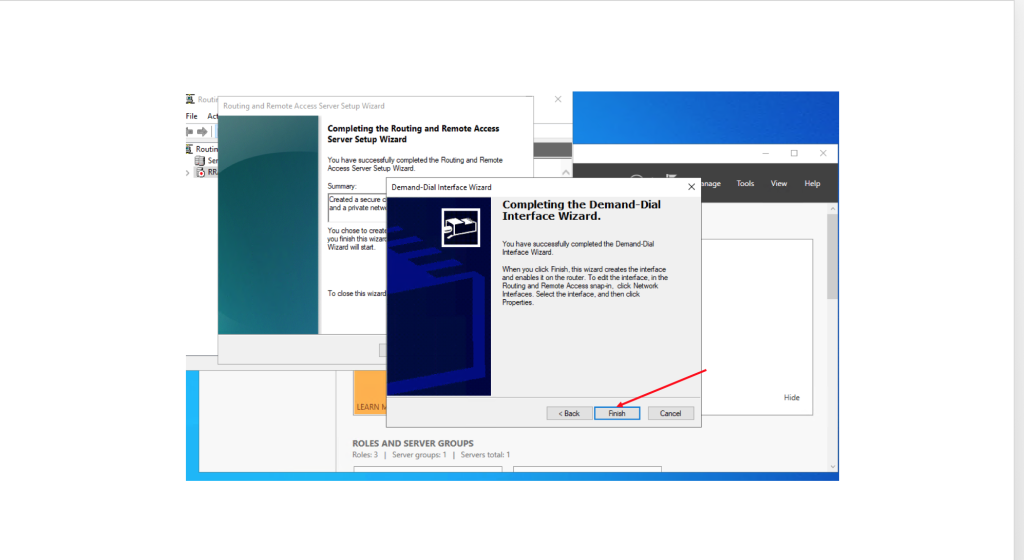
This image shows the final step of the Demand-Dial Interface Wizard in the Routing and Remote Access Server (RRAS) configuration on a Windows Server.
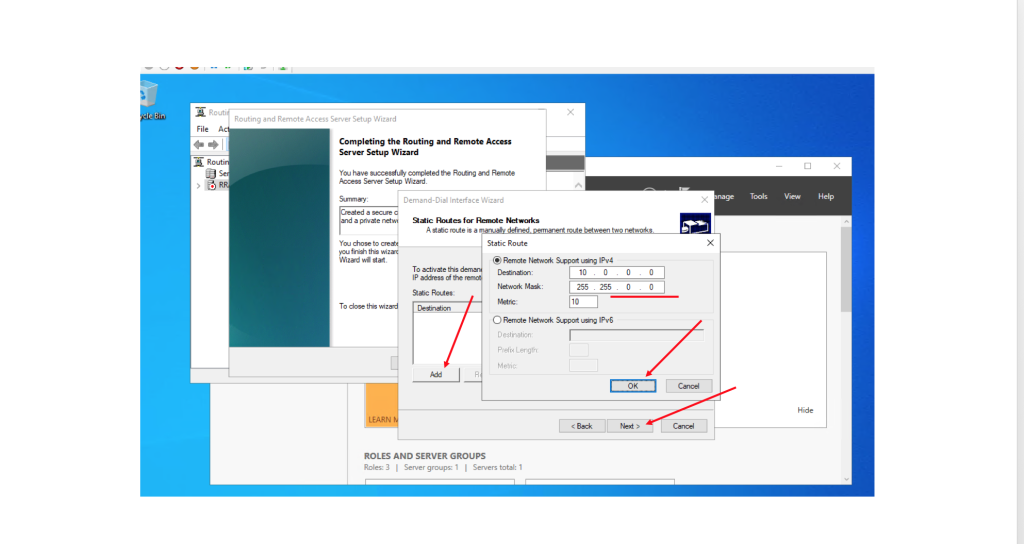
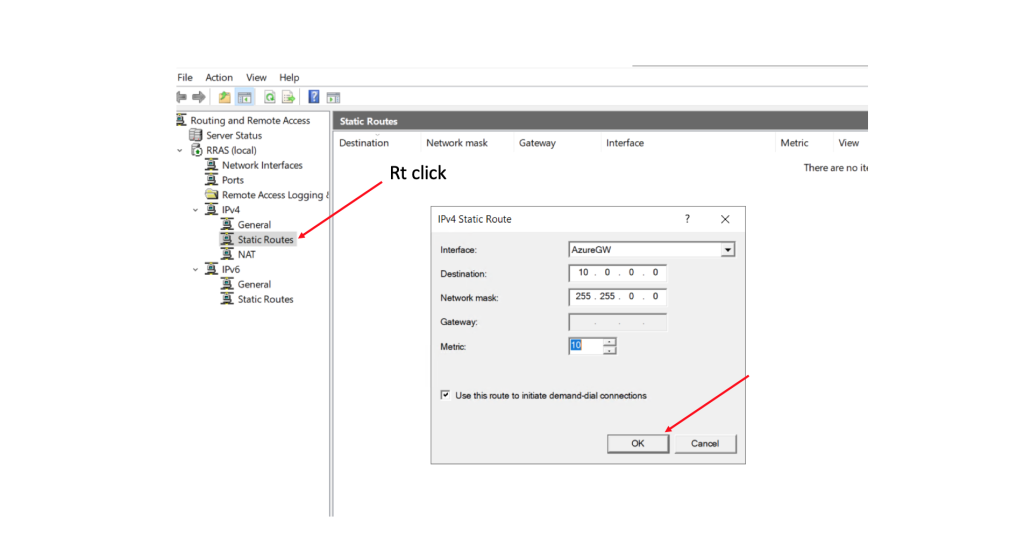
This image shows how to add a static route in the Routing and Remote Access Service (RRAS) on a Windows Server. This step is part of configuring a VPN connection between an on-premises network and Azure.
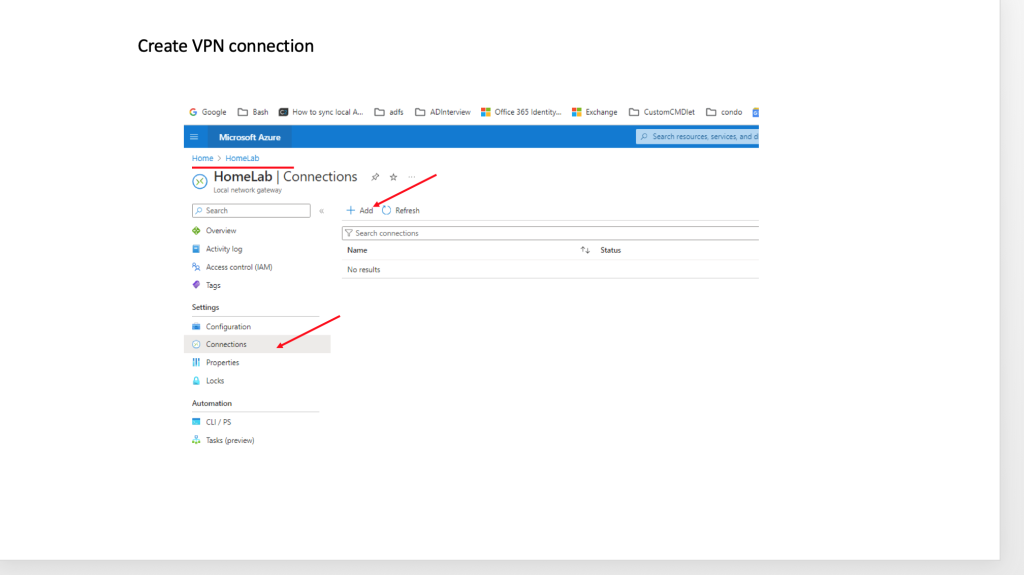
This image shows the Azure portal interface where you’re about to create a VPN connection between Azure and the on-premises environment.
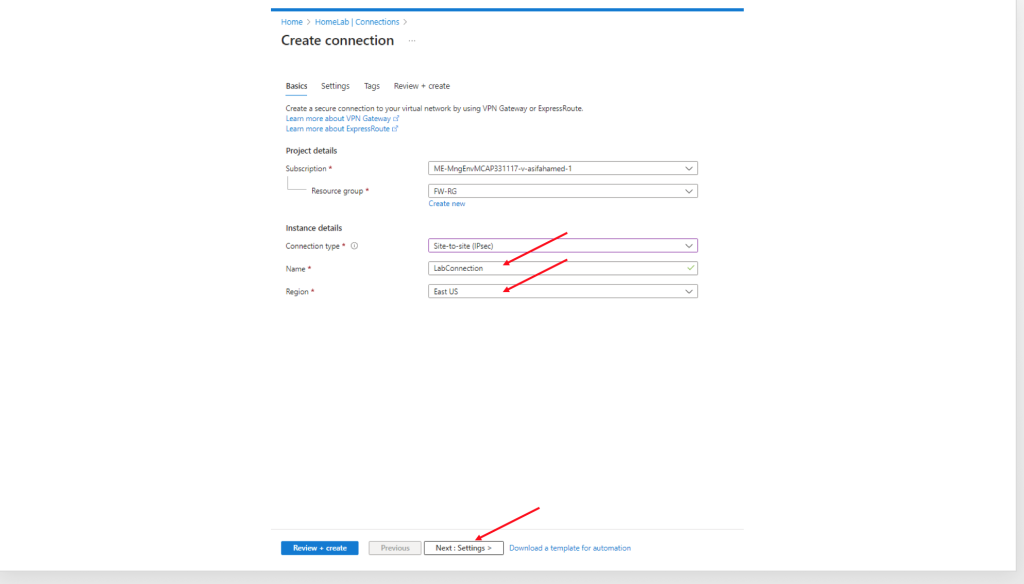
This image shows the “Create connection” page in the Azure Portal, where you’re setting up a Site-to-Site VPN connection between your Azure environment and your on-premises (local) network.
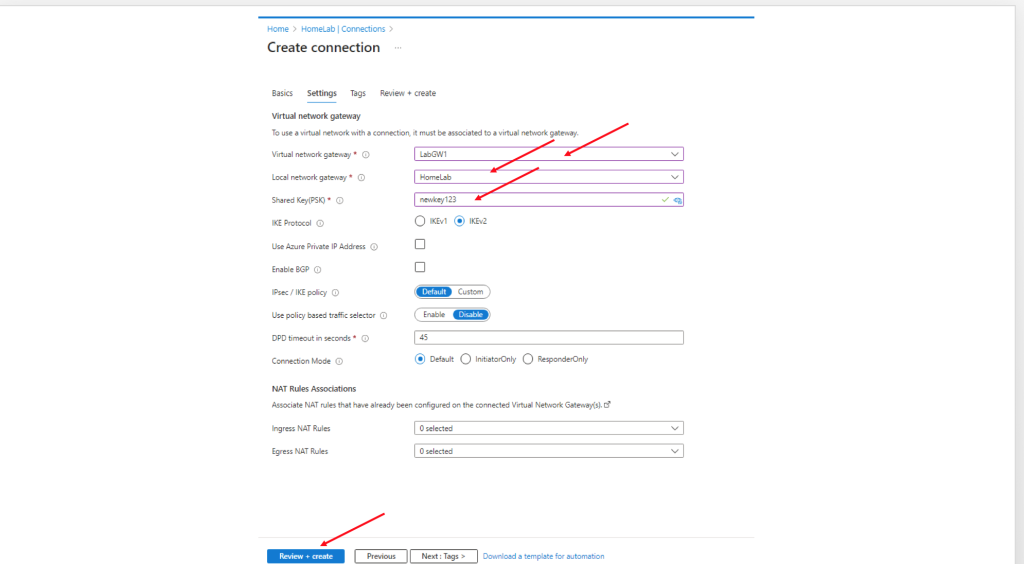
This image shows the “Settings” step in the Azure portal for creating a Site-to-Site VPN connection between Azure and an on-premises network.
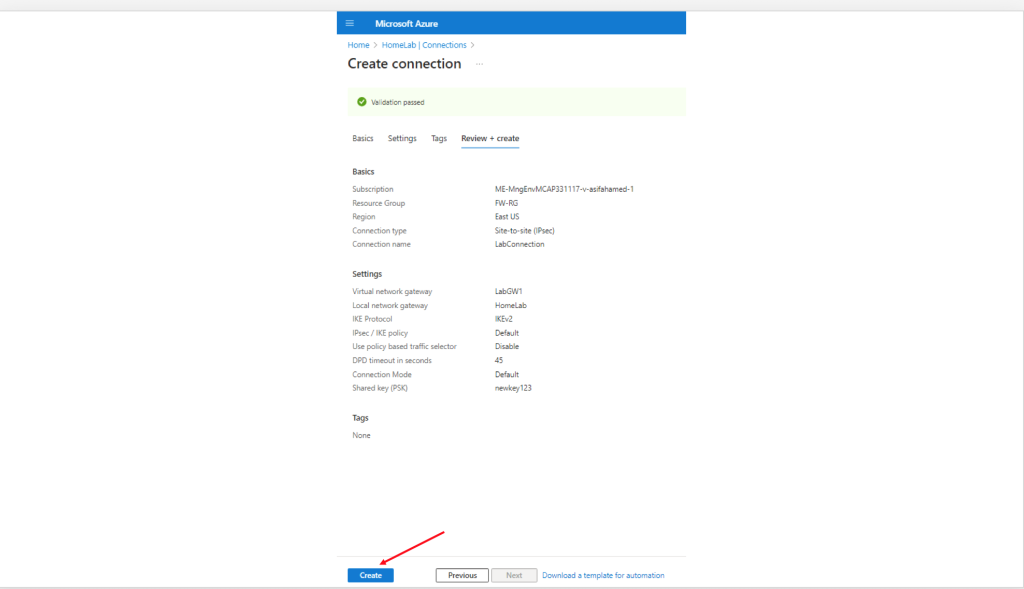
This image shows the final review step before creating a Site-to-Site VPN connection in the Azure portal.
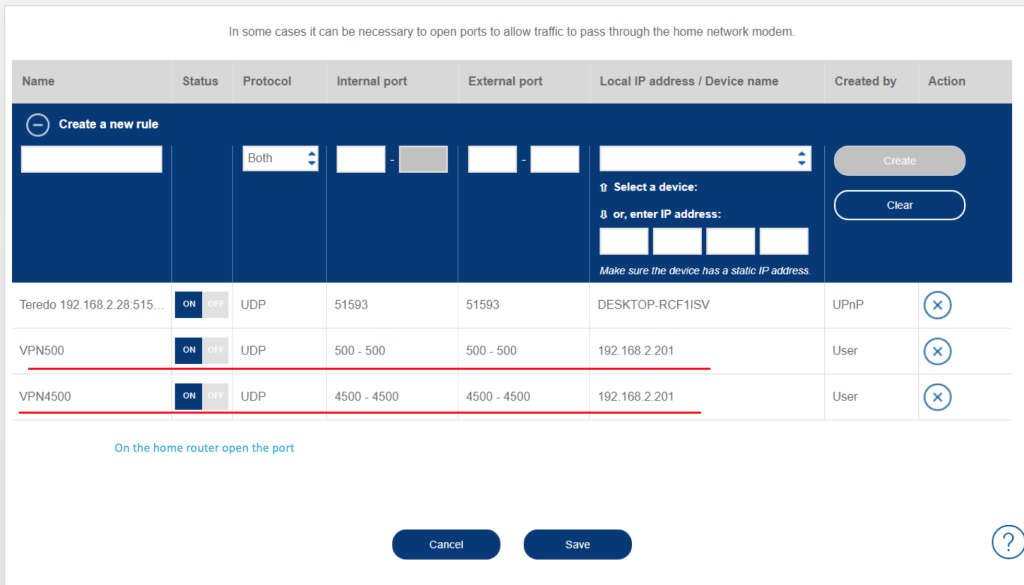
This image shows port forwarding settings on a home router to support VPN (Virtual Private Network) connectivity — specifically for IPSec VPNs
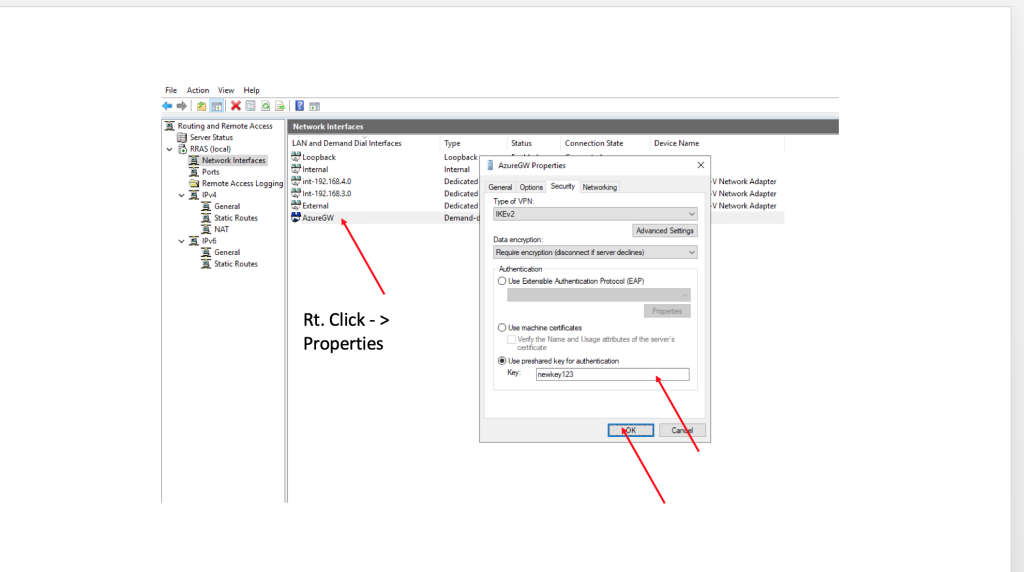
This image shows part of the configuration process for setting up a VPN connection in Windows Server Routing and Remote Access (RRAS), specifically for a demand-dial interface connecting to Azure.
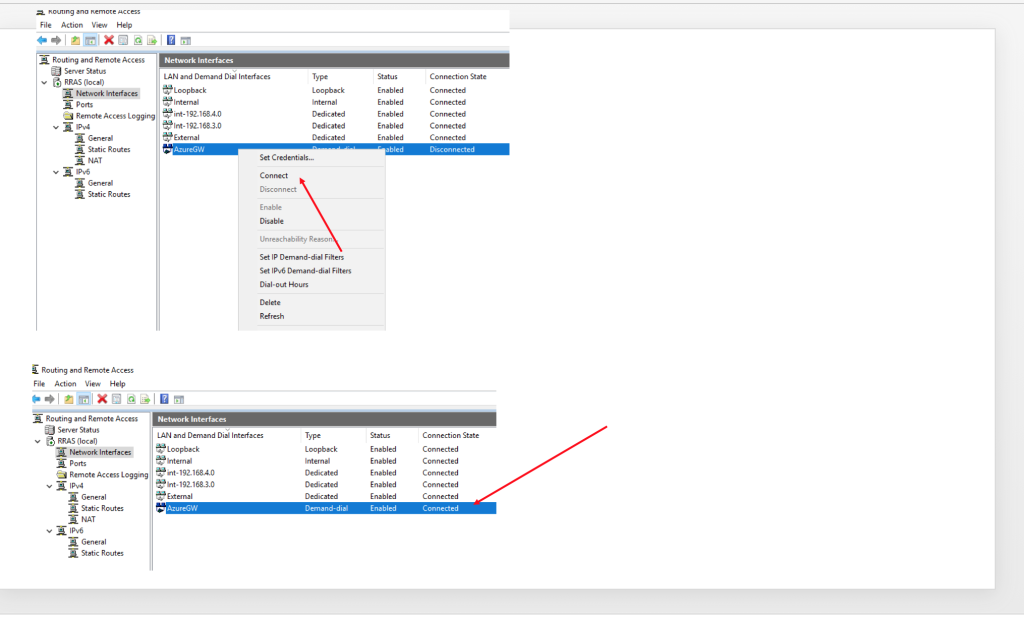
This image shows the final step in establishing a site-to-site VPN connection from an on-premises RRAS (Routing and Remote Access Service) server to Azure using a demand-dial interface.
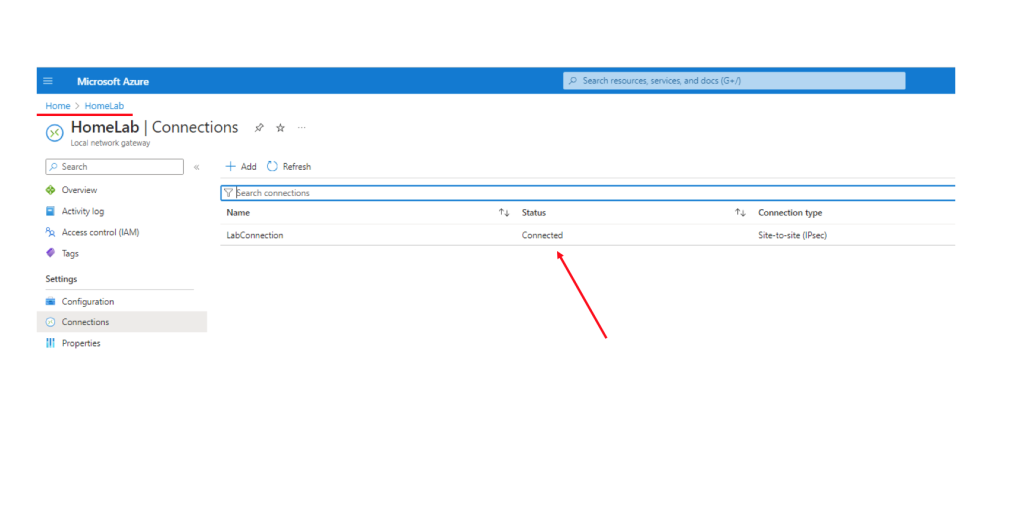
This image shows the Azure portal screen confirming a successful Site-to-Site VPN (IPsec) connection.
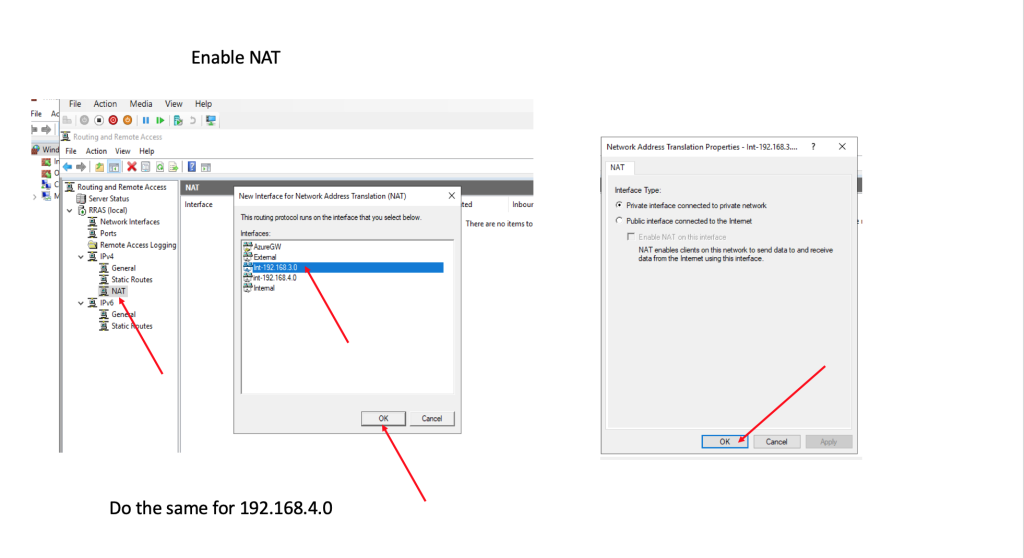
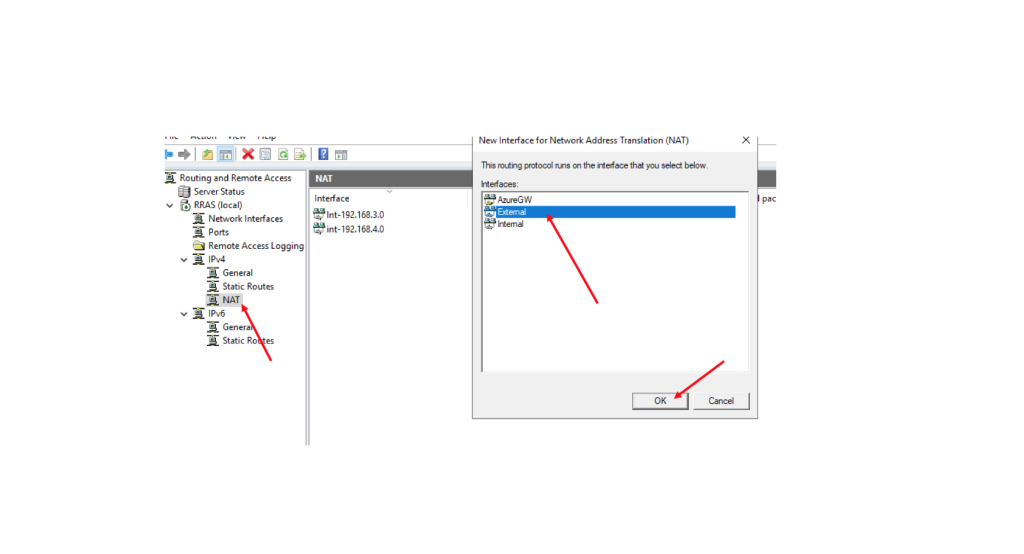
This image demonstrates how to enable NAT (Network Address Translation) on a Windows server using the Routing and Remote Access Service (RRAS) console.
This image shows the process of enabling NAT (Network Address Translation) for the external network interface in Windows Routing and Remote Access Service (RRAS).
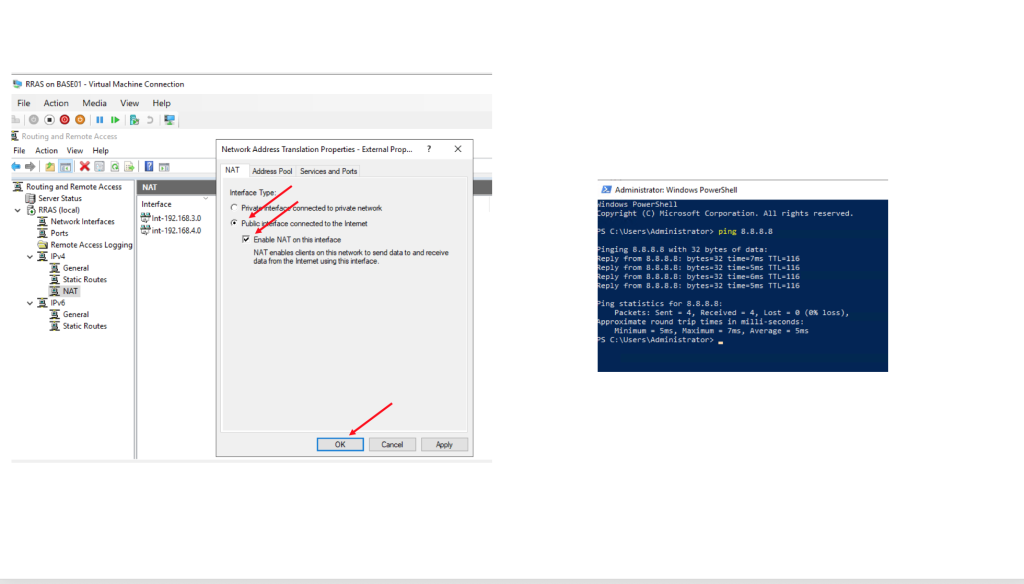
This image demonstrates the final step of enabling NAT on the external network interface and verifying internet connectivity.